
How to Move Your Website From WordPress to Claude Code
A step-by-step migration guide: audit your WordPress site, export content, hand your theme to Claude, replace each plugin, keep your rankings, and launch.
Wyatt Johnson
October 9, 2026
In short
- 01 The move has seven stages: audit, scaffold, export content, rebuild the design, replace plugins, protect SEO, then launch. Most of the risk sits in stages one and six.
- 02 Claude Code does the heavy lifting once it has the right inputs: your WordPress export file, your theme files, screenshots of the live site, and a URL map.
- 03 Every plugin has a code-level replacement. Forms, SEO fields, redirects, sitemaps and caching are the ones to plan first.
- 04 Keep WordPress running, untouched, until the new site has been live and stable for at least 30 days.
This guide walks through moving a WordPress marketing site or blog to a code-based site that Claude Code builds and edits. It assumes you can use a terminal and copy and paste commands. It does not assume you can write code. Claude Code writes the code; you supply the inputs and check the results.
If you are still deciding whether to make the move, read Should You Migrate From WordPress to Claude Code? first. If you already know you want out, start here.
Here is the whole path at a glance:
| Stage | What you do | Time for a 30 to 100 page site |
|---|---|---|
| 1. Audit | Inventory pages, plugins, URLs and rankings | 2 to 4 hours |
| 2. Scaffold | Install Claude Code, create the project, write a CLAUDE.md | 1 hour |
| 3. Content | Export WordPress, convert posts and pages to files | 2 to 4 hours |
| 4. Design | Give Claude your theme files and screenshots, rebuild the templates | 1 to 3 days |
| 5. Plugins | Replace each plugin with code or a service | 1 to 2 days |
| 6. SEO | Map URLs, add redirects, carry over metadata, schema and sitemap | 3 to 6 hours |
| 7. Launch | QA, deploy, switch DNS, monitor | 1 day plus a monitoring period |
Stage 1: Audit your WordPress site
Do not skip this. The audit decides what you rebuild, what you drop, and what you have to protect.
List every plugin and what it does
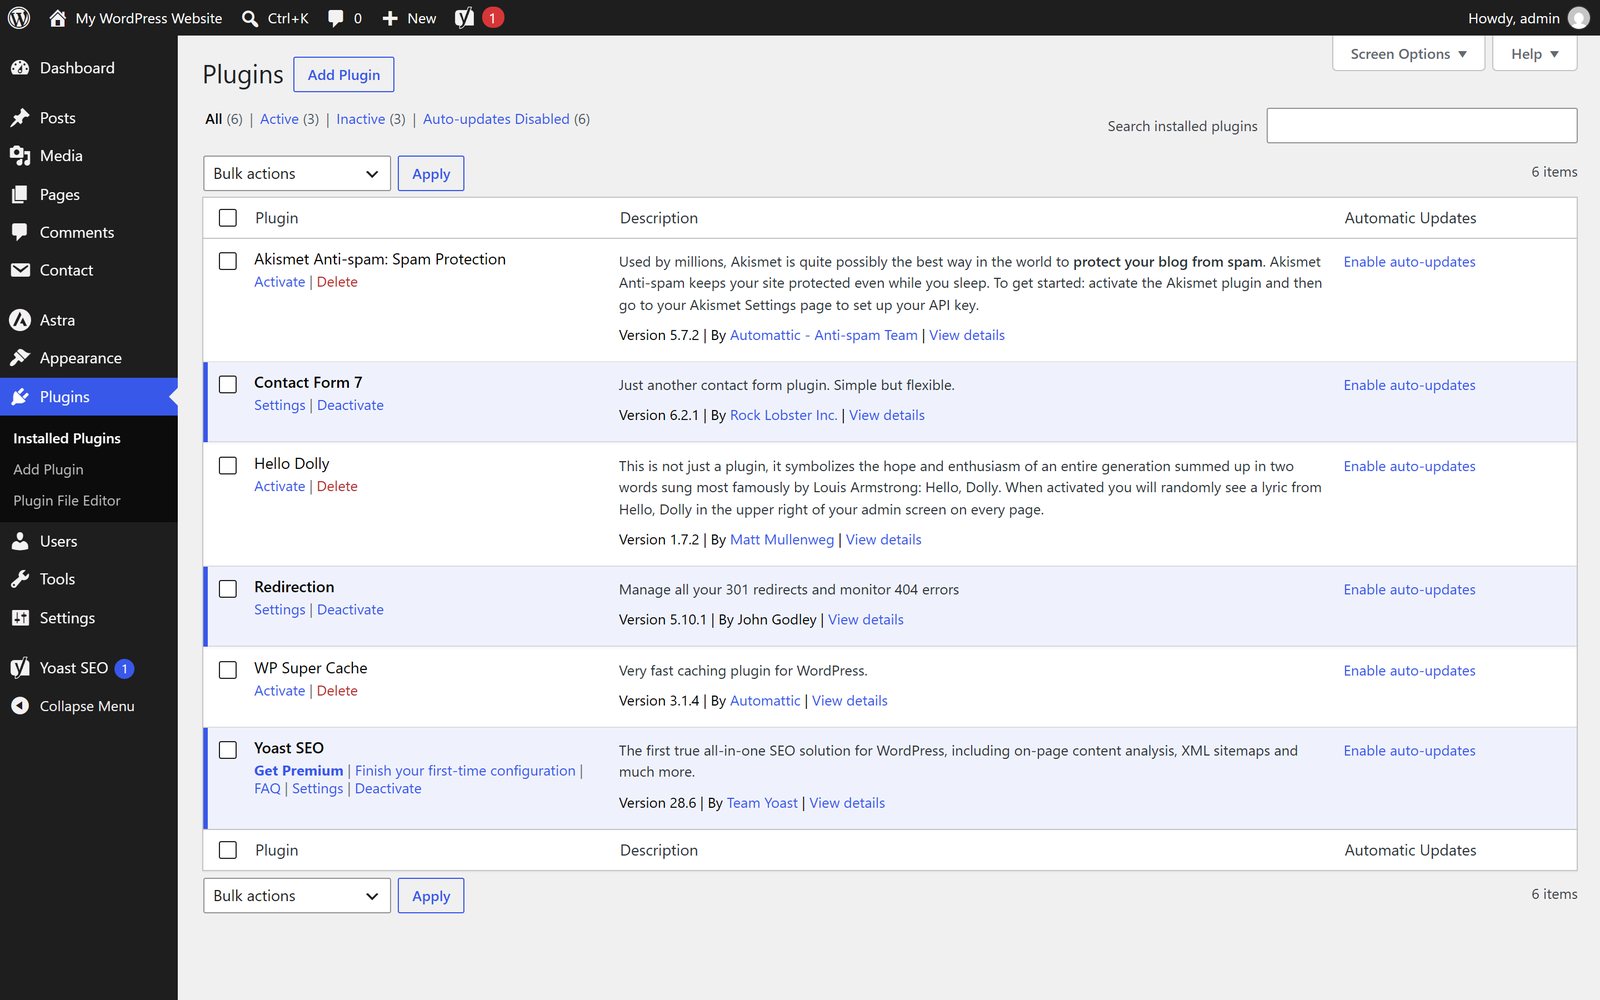
In your WordPress dashboard, open Plugins → Installed Plugins. Write down every active plugin and, next to it, the job it does on your site.
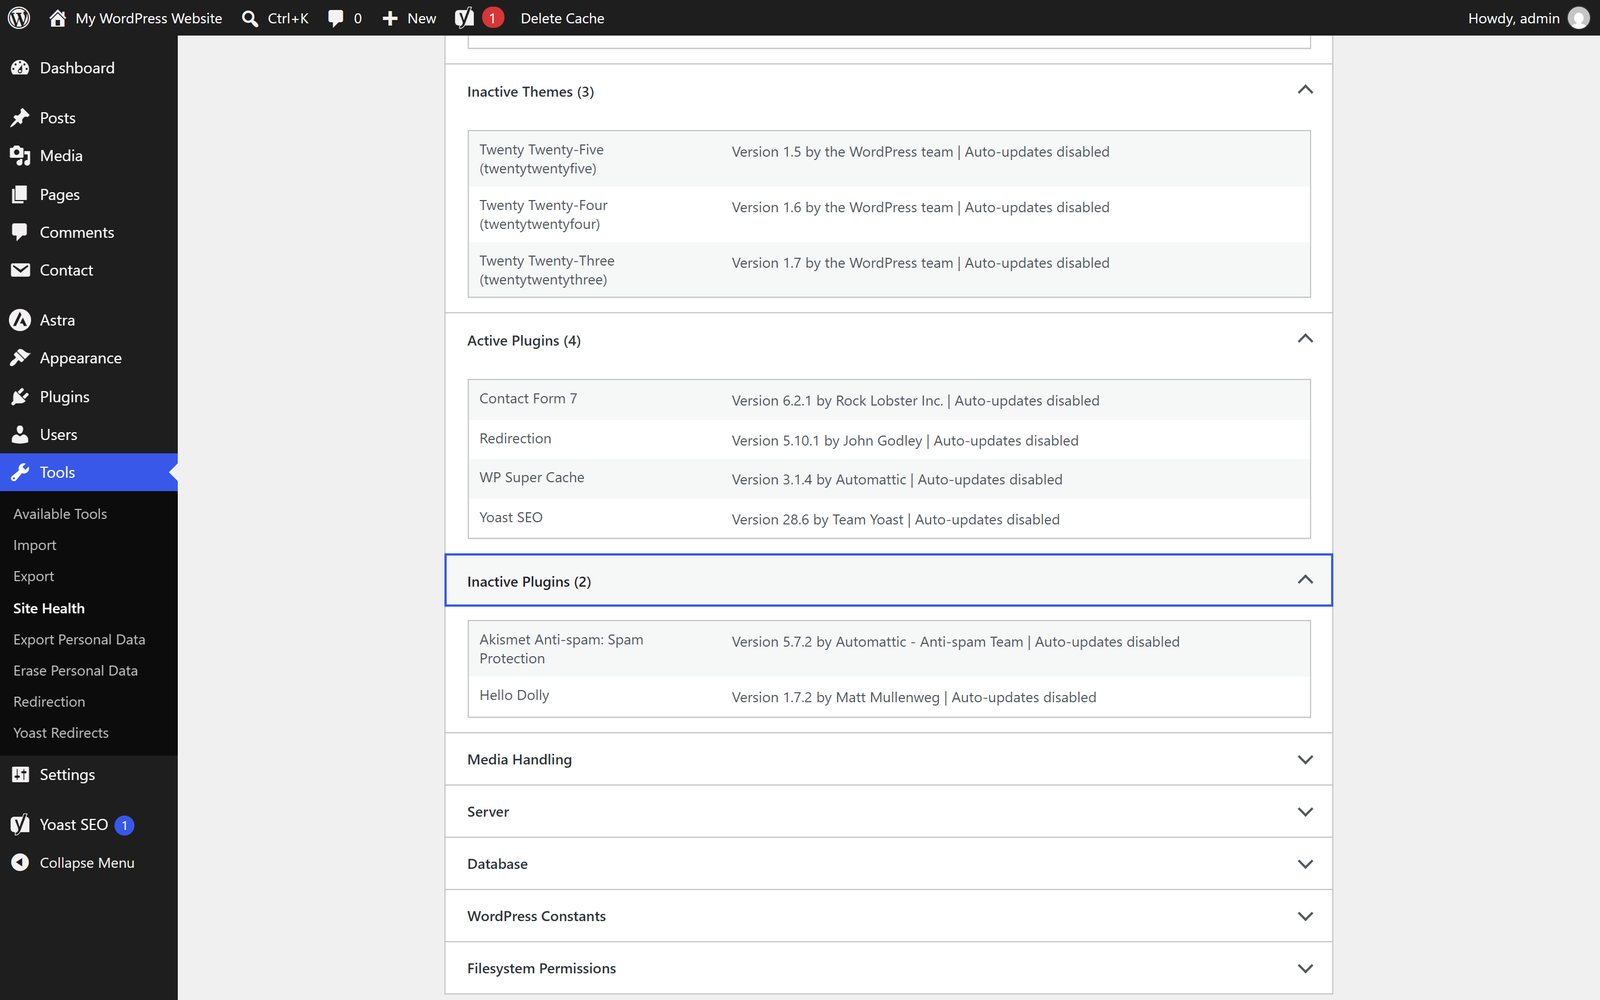
For a cleaner list with version numbers, go to Tools → Site Health → Info and expand Active Plugins and Active Theme. You can copy this whole page into a text file and hand it to Claude later.
Sort each plugin into one of four buckets:
- Replace with code. Things like SEO fields, sitemaps, redirects, related posts and table of contents.
- Replace with a service. Things like form handling, email signup and site search.
- Drop. Caching, security scanners, database cleaners and page builders you rebuild by hand. A static site does not need them.
- Blocker. A plugin you cannot replace cleanly, such as a membership system or a full store. If you have one, the decision is whether to keep that part of the site on WordPress. A common setup is the marketing site on code and the store on a subdomain.
Inventory your URLs
Every URL that ranks or earns links is an asset. Collect them from three places:
- Your sitemap. WordPress has a built-in one at
/wp-sitemap.xml. Yoast and Rank Math publish/sitemap_index.xml. Save every URL into a spreadsheet. - Google Search Console. Export your top pages by clicks for the last 16 months. If you would rather ask questions than export CSVs, our Google Search Console MCP server guide connects Claude straight to this data.
- Your analytics. Pull the top 50 landing pages by sessions and any page that drives conversions.
Mark every URL as keep, merge (redirect to a better page) or retire (redirect to the closest relevant page). Nothing should end in a 404 unless you mean it to.
Record a baseline
Before you change anything, save the numbers you will compare against after launch: clicks, impressions and average position from Search Console, plus conversion counts from analytics. Without a baseline you cannot tell a migration problem from normal movement.
Check your permalink structure
Open Settings → Permalinks. The structure shown here decides what your URLs look like, and your new site has to reproduce it exactly or redirect from it.
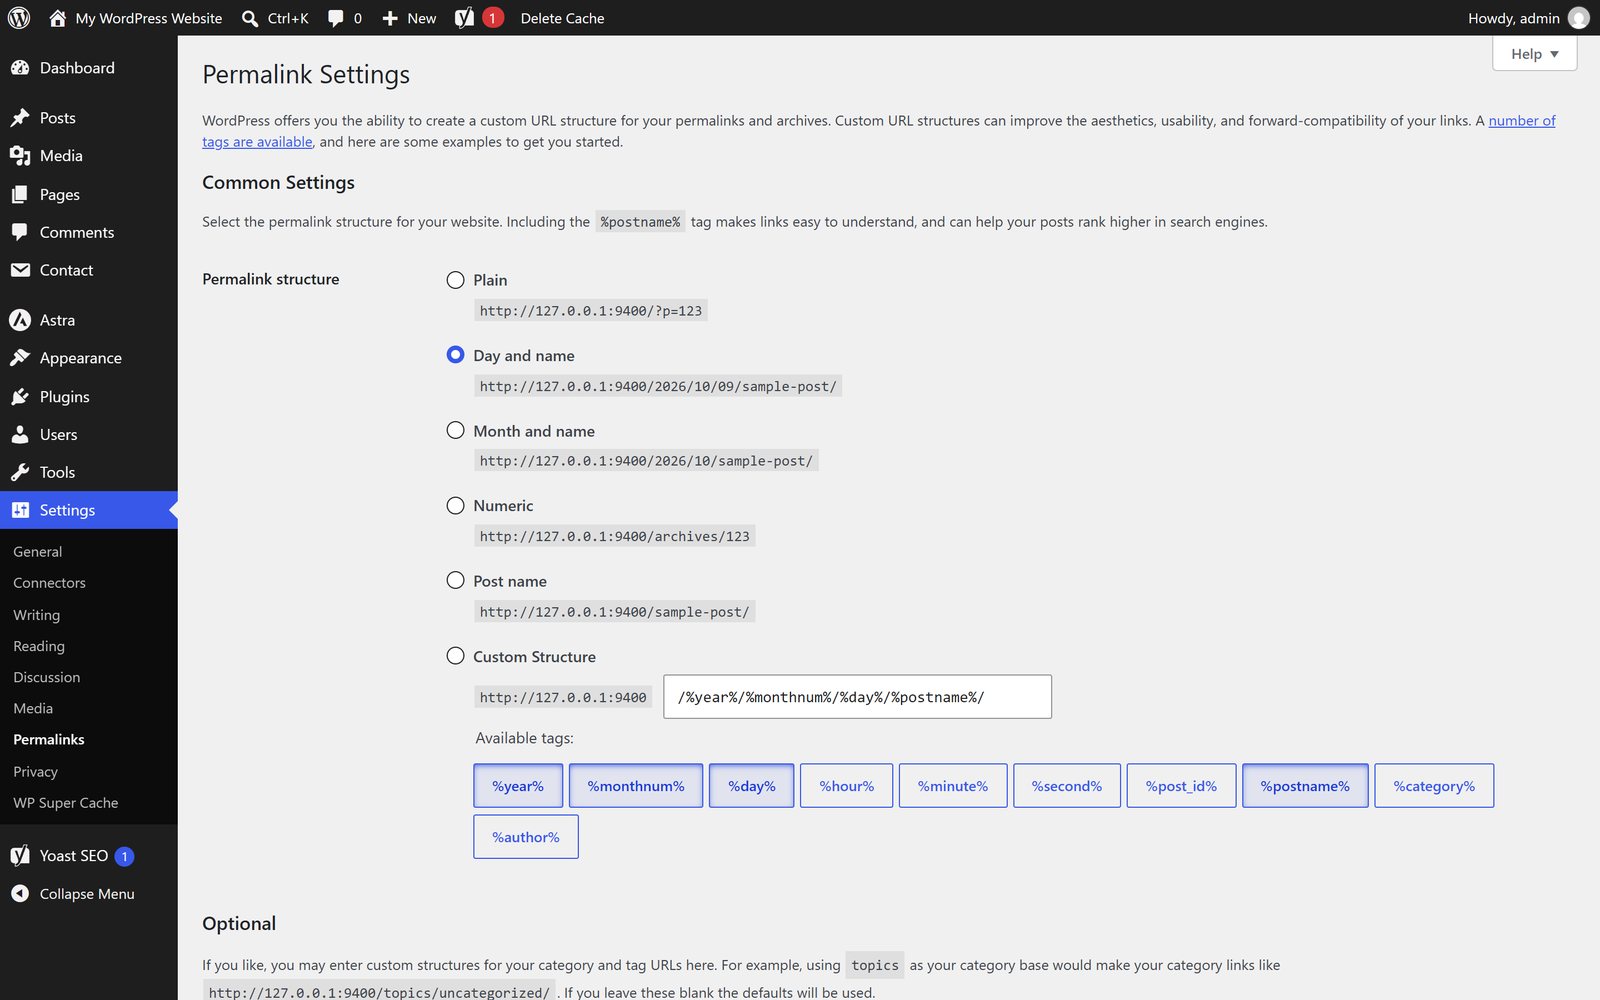
If you use /%postname%/, a post at /my-post/ should live at /my-post on the new site. If you use a date-based structure, you will either rebuild those paths or write redirects for every post. Keeping the old paths is simpler and safer.
Stage 2: Set up Claude Code and the project
Install the tools
You need four things on your computer:
- Node.js (the current LTS version) from nodejs.org.
- Git from git-scm.com.
- Claude Code, installed with Anthropic’s installer. Follow the current instructions in the Claude Code documentation, then run
claudein a terminal and sign in. - A GitHub account (or GitLab or Bitbucket) to store the site’s code.
Choose a framework
Claude Code can build in anything, so pick the framework that fits a content site. We use Astro for most marketing sites and blogs. It ships plain HTML by default, so pages load fast, and it has a content system built for folders of Markdown and MDX files, which is exactly what a blog export turns into. Next.js is a better fit if the site has app-like features.
Create the project:
npm create astro@latest my-site
cd my-site
git init
claude
Write a CLAUDE.md
CLAUDE.md is a file in the project root that Claude Code reads at the start of every session. It is where you write down the rules of the site, so you do not repeat them in every prompt. Start with this and add to it as you go:
# Site notes

This site is a migration of https://www.example.com from WordPress.

- Framework: Astro with Tailwind and MDX.
- Blog posts live in src/content/blog/. Pages live in src/pages/.
- Every URL on the old site must exist on the new site at the same path,
  or be redirected in vercel.json. Never delete a URL without adding a redirect.
- Every page needs a unique title (under 60 characters) and meta description.
- Run `npm run build` after changes and fix any errors before finishing.
- Copy rules: plain language, no em dashes.
Commit this file. From here on, every stage is a conversation with Claude Code inside this folder.
Stage 3: Export your content
Export posts, pages and metadata
In WordPress, go to Tools → Export, choose All content and click Download Export File.
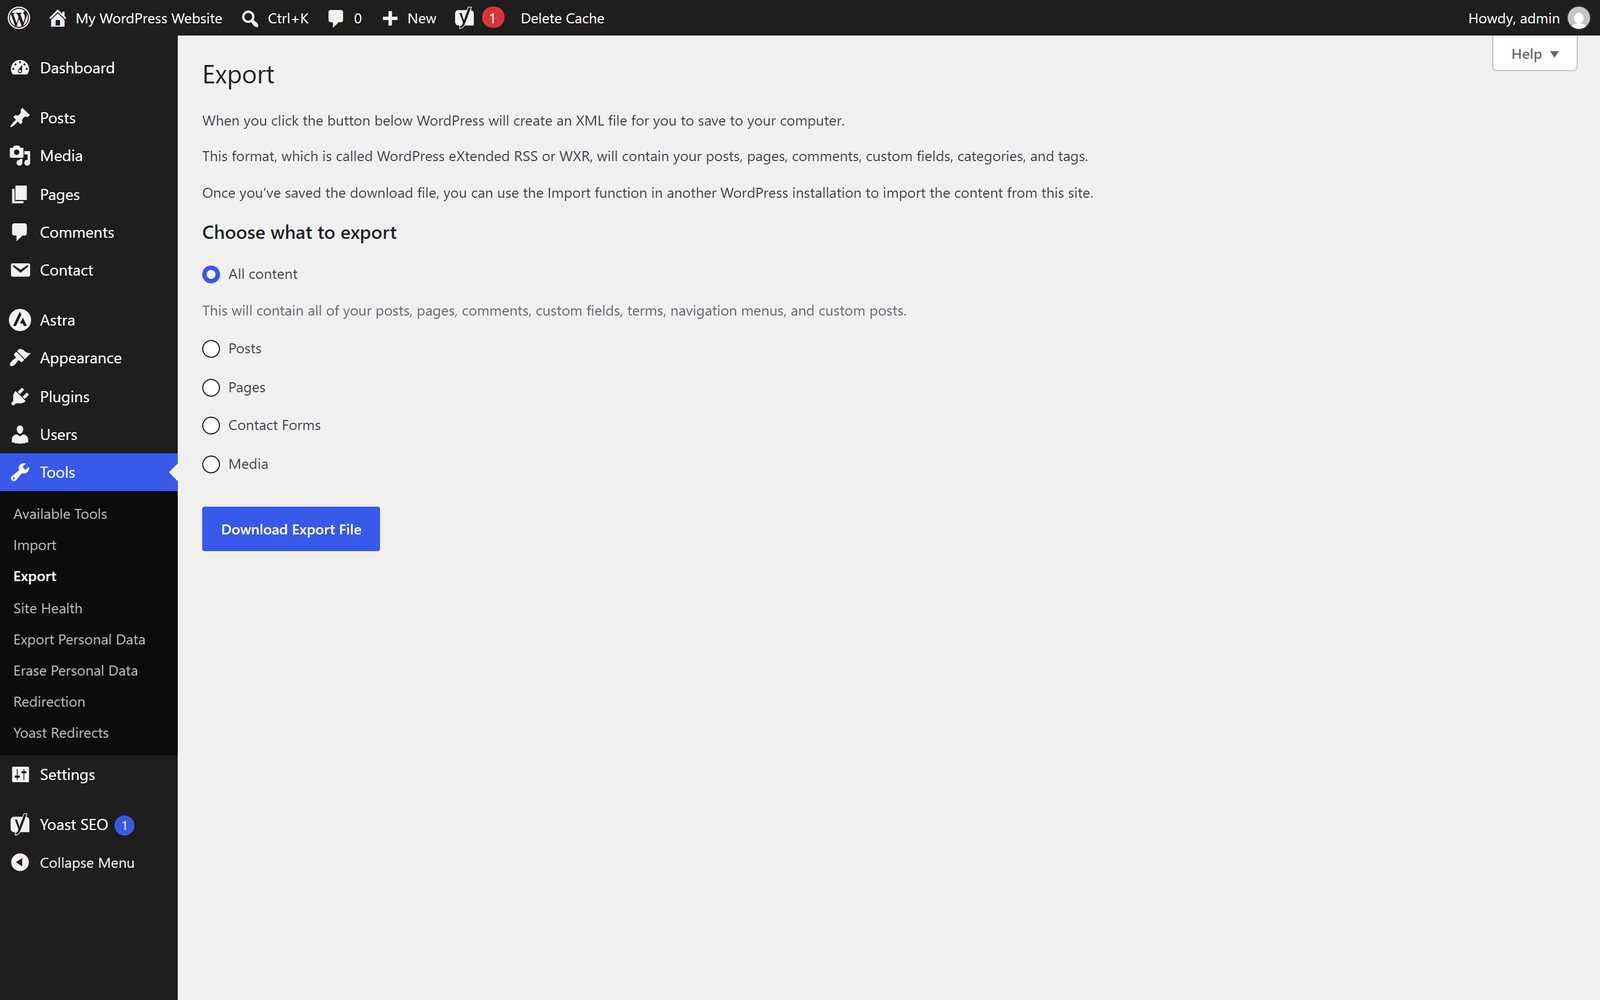
You get one XML file, called a WXR file. It contains every post, page, category, tag, author, comment and custom field. It also includes SEO fields stored as custom fields, which usually means your Yoast or Rank Math titles and descriptions (check for keys like _yoast_wpseo_title and _yoast_wpseo_metadesc once you open the file). It does not include images, theme files or plugin settings.
Put the file in a migration/ folder inside your project, then give Claude this prompt:
Read migration/export.xml (a WordPress WXR export). Write a Node script at
scripts/convert-wxr.mjs that converts every published post to an MDX file in
src/content/blog/ and every published page to a draft in migration/pages/.

Requirements:
- Filename is the post slug. Frontmatter has title, description, date (YYYY-MM-DD),
  author, tags and category.
- The description comes from the Yoast meta description if present, otherwise
  the first 155 characters of the post text.
- Convert the HTML body to clean Markdown. Keep headings, lists, tables, links,
  and image tags. Convert WordPress shortcodes and Gutenberg block comments
  into plain Markdown. Flag any you cannot convert in a report.
- Rewrite image URLs to /images/<filename>.
- Write migration/report.md listing every post, its original URL, and any
  conversion warnings.
Run it, then show me the report.
Claude will write the script, run it, and give you a report of anything that did not convert cleanly. Read that report. It is the fastest way to find odd shortcodes, embedded forms and page builder markup before you see them broken on a page.
Move your images
The WXR file points at images but does not contain them. You have three ways to get them:
- Your host’s file manager or SFTP. Download the whole
wp-content/uploads/folder. This is the most complete option. - A script. Ask Claude to read the export, collect every image URL, and download each one. This works when you cannot reach the server.
- Backup plugin. A plugin such as UpdraftPlus can produce a zip of your uploads folder.
Put the files in public/images/. WordPress also saves several resized copies of each image, like photo-300x200.jpg. You only need the originals, and Astro generates the right sizes at build time. Ask Claude:
In public/images there are WordPress uploads including resized copies like
name-300x200.jpg. Find the original of each, delete the resized copies, and
update every image reference in src/content/blog to point at the original.
Then add width, height and alt text handling so every image has an alt attribute.
Show me any images that have no alt text so I can write them.
Pull in anything the export missed
WordPress also exposes a read-only API. Visiting https://yoursite.com/wp-json/wp/v2/posts?per_page=100 returns your posts as JSON, which is useful for custom post types (like case studies or team members) that the standard export handles poorly. Ask Claude to fetch them from the API and convert them the same way.
Stage 4: Rebuild the design
This is where most people assume the hard part is. It is more manageable than it looks, because you are giving Claude three kinds of input at once: the theme’s code, the rendered pages, and screenshots.
Find out which theme you are on
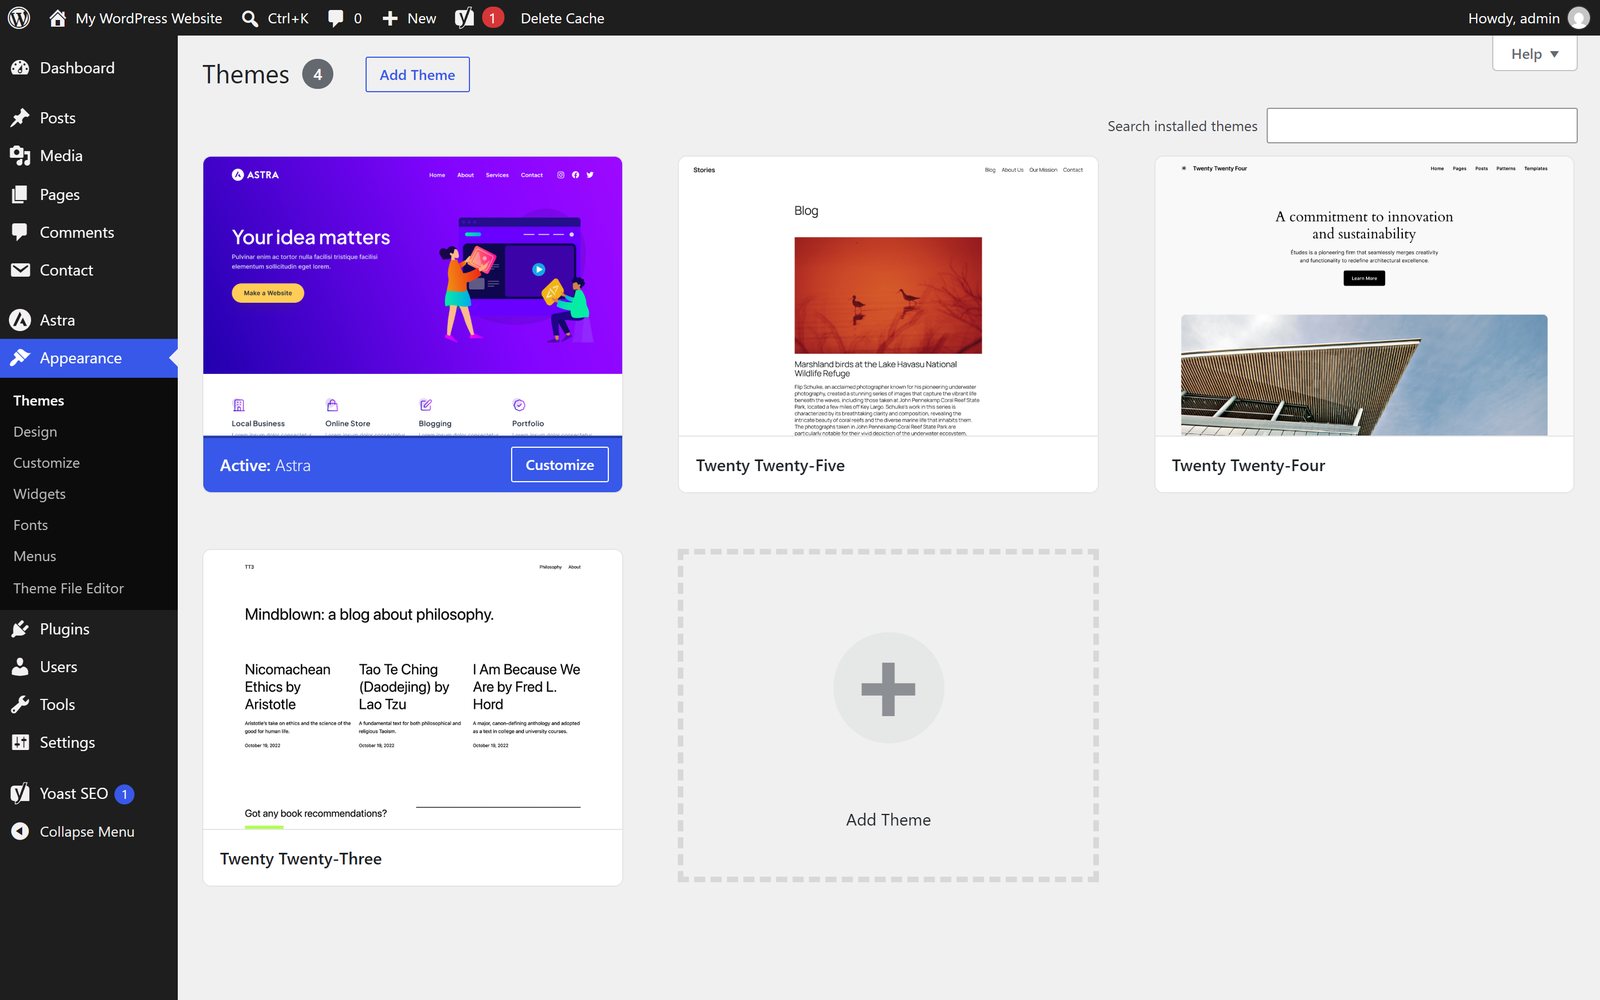
Go to Appearance → Themes. The active theme is the one marked Active. Note whether it is a stock theme, a purchased theme, or a custom or child theme, because that tells you how much of the design lives in files and how much lives in a page builder.
Get the theme files
Your theme lives in wp-content/themes/<theme-name>/ on the server. Download that folder through SFTP or your host’s file manager. If you use a child theme, download both the child and its parent.
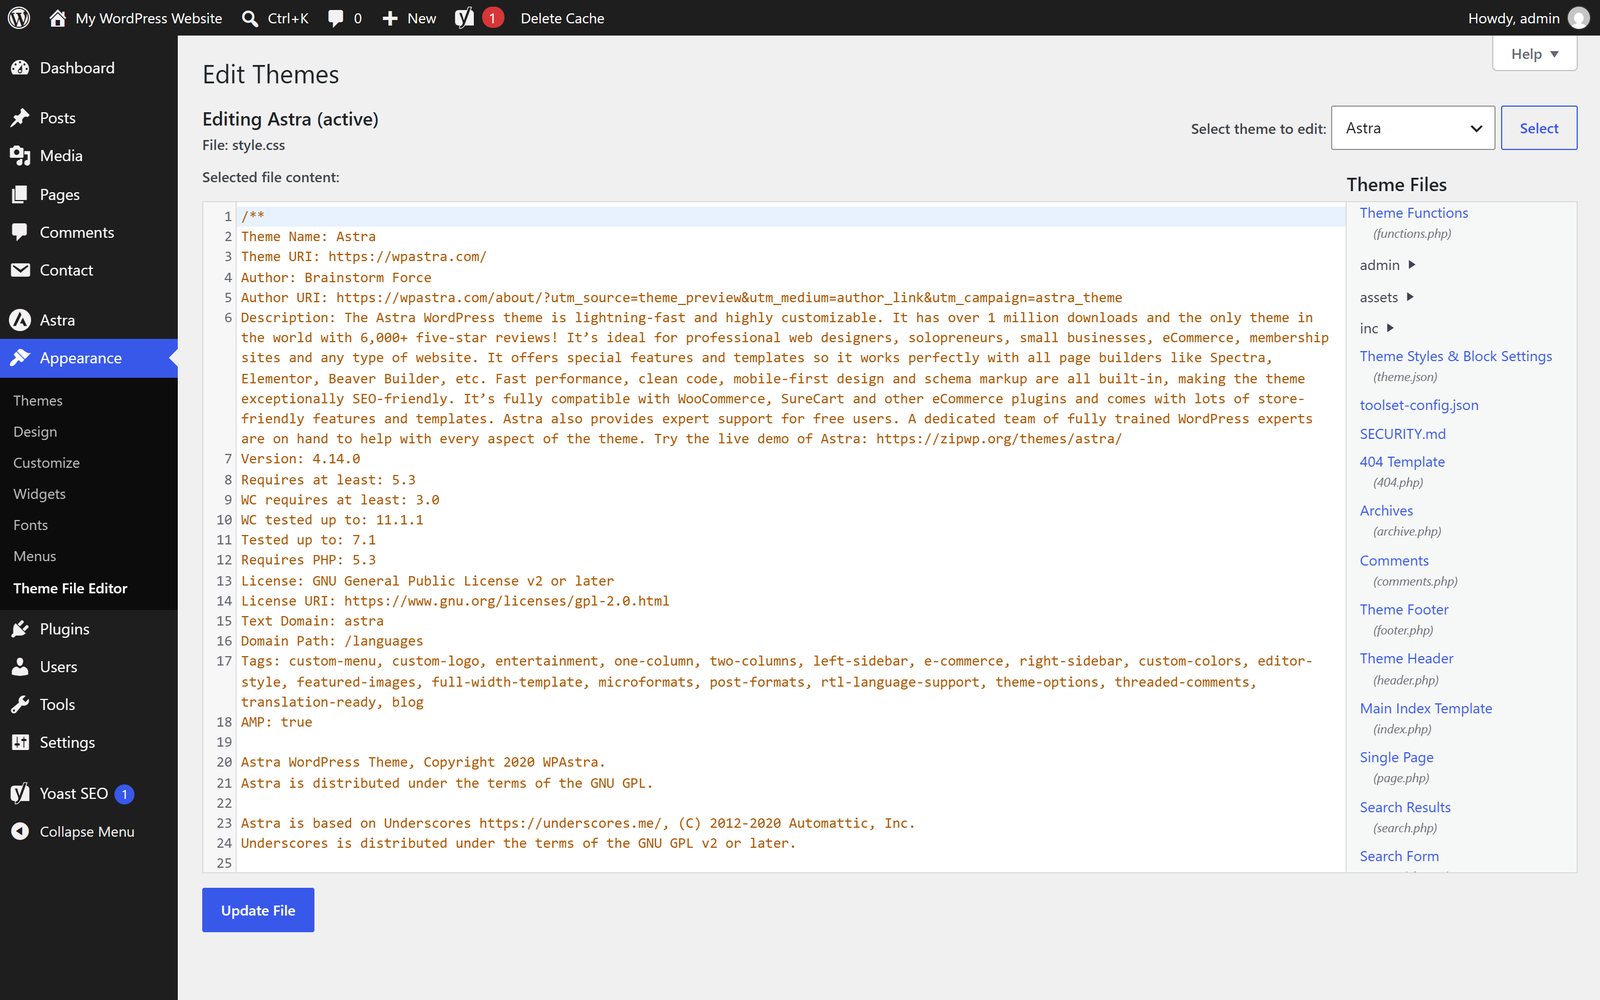
You can also read individual files in the dashboard under Appearance → Theme File Editor. This is handy for spotting how the theme is organized: style.css holds the styles, functions.php holds the logic, and the template files like header.php and single.php define each page layout.
Copy the theme folder into migration/theme/. You are not shipping any of it. It is reference material for Claude.
Capture the rendered pages and screenshots
Theme files only tell half the story, especially with Elementor, Divi or WPBakery, where layout lives in the database. So also give Claude what visitors actually see:
- Save the rendered HTML of each page template you use (home, a service page, a blog post, the blog index, contact). In Chrome, open the page and use File → Save Page As → Webpage, HTML Only. Or ask Claude to fetch them with
curl. - Take full-page screenshots at desktop and mobile width. In Chrome DevTools, press
Ctrl+Shift+P(Cmd+Shift+Pon Mac), type “screenshot”, and choose Capture full size screenshot. - Write down your brand basics: logo files, brand colors, fonts, and any usage rules.
Put them in migration/reference/. Claude Code can read images, so you can point it at the screenshot files directly.
Prompt Claude to extract the design system first
Do not ask for the whole site at once. Have Claude pull out the design tokens first, then build components, then pages.
Look at migration/theme/ and migration/reference/. First, extract the design
system and write it to src/styles/global.css as Tailwind theme tokens: colors,
font families, font sizes, spacing, border radius and shadows. Use the computed
values from the theme's style.css and the screenshots, not guesses.

Then create these components in src/components/: Header, Footer, Button,
Card, and PostLayout. Match the screenshots in migration/reference/.

Build a /design-check page that shows every component, and tell me when it
is ready so I can compare it with the old site.
Open the local site (npm run dev) next to the old one. Tell Claude what is off in plain language: “the header is 20px too tall”, “the button radius should be fully rounded”, “heading weight is too heavy”. It is fast to iterate this way.
Rebuild templates, then pages
Once the components match, move to page templates, one at a time: blog post, blog index, then each landing page. For each, point Claude at the saved HTML and the screenshot of the original and ask it to match both.
If you are working from a page builder, say so in the prompt. Something like: “This page was built in Elementor. Ignore the Elementor markup and rebuild the layout you see in the screenshot using our components.”
Expect the first pass to be roughly 90% right. The last 10% is the part where your eye matters most, so budget time for it.
Stage 5: Replace your plugins
Take the plugin list from your audit and work through it. This table covers the common ones.
| WordPress plugin or feature | What replaces it | Notes |
|---|---|---|
| Yoast SEO, Rank Math, All in One SEO | Frontmatter fields plus a layout that renders the title, description, canonical, Open Graph and JSON-LD | Carry over the exported titles and descriptions |
| XML sitemap (Yoast, core) | @astrojs/sitemap or a generated sitemap.xml | Include lastmod dates |
Redirection, Yoast redirects, .htaccess rules | Redirect rules in your host config such as vercel.json or _redirects | Export the old rules as CSV and give them to Claude |
| Contact Form 7, WPForms, Gravity Forms | A form endpoint such as Formspree, Basin or Resend, or a serverless function | Keep the same fields and the same notification email |
| WP Super Cache, WP Rocket, W3 Total Cache | Nothing. Static pages are already fast | Drop |
| Smush, ShortPixel, Imagify | Built-in image optimization in the framework | Drop |
| Wordfence, Sucuri, Akismet | Nothing for a static site. Add spam protection to forms | Drop |
| Elementor, Divi, WPBakery | Components and templates Claude writes | This is stage 4 |
| Advanced Custom Fields | A typed content schema | Fields become frontmatter |
| Site Kit, MonsterInsights | A GA4 script or tag manager snippet | Reinstall the same measurement ID |
| Mailchimp or newsletter plugins | The provider’s embed or API | Same list, new form |
| Table of contents plugins | Generated from headings in the post layout | Often a few lines of code |
| Related posts plugins | Computed from shared tags at build time | |
| Search plugins | Pagefind, a static search index | Free and runs in the browser |
| Comments | Remove, or use a service like Giscus | Most marketing sites can drop comments |
| WooCommerce, membership plugins | Usually keep these on WordPress or move to a dedicated platform | This is the blocker bucket |
Example: replace a contact form
The old site had a Contact Form 7 form on /contact with fields: name, email,
company, message. Rebuild it as an Astro component. Submit it to a serverless
function at /api/contact that validates the fields, blocks spam with a hidden
honeypot field, and sends the message to hello@example.com using Resend.
Show a success message on the page without reloading.
Add the RESEND_API_KEY to .env.example and document it in the README.
You will need to create the Resend account and add the API key to your host’s environment settings yourself. Claude cannot do that for you, and you should not paste secret keys into a chat.
Example: replace Yoast
Create a SEO component used by every layout. It takes title, description,
canonical URL and image. It outputs the title tag, meta description,
canonical link, Open Graph and Twitter card tags, and JSON-LD: Organization
site-wide, BlogPosting on posts, BreadcrumbList on nested pages.
Fall back to the site default image when none is set.
Then audit every page and post and list any with a missing description or a
title over 60 characters.Stage 6: Protect your SEO
This stage decides whether the migration is a quiet success or a traffic drop. It is mostly mechanical, so it suits Claude Code well.
Build the redirect map
From your URL inventory, find every old URL whose new path is different. This includes category and tag archives, date archives, author pages, /feed/ URLs and attachment pages. Give Claude the list:
Here is migration/urls.csv with old URLs from the WordPress sitemap and
Search Console. Check each against the routes in the new site. For any old URL
that does not exist on the new site, add a permanent (301) redirect in
vercel.json to the closest matching page. Report any that have no good match
so I can decide. Never redirect to the homepage unless nothing else is relevant.
Keep everything search engines read
Check each of these on the new site against the old one:
- Title tags and meta descriptions. They should match the old ones unless you are deliberately improving them.
- Headings and body content. Do not rewrite pages during the migration. Change one thing at a time.
- Internal links. Update any that point at old paths or at the
wwwor non-wwwversion you no longer use. - Canonical tags. Each page should point at its own final URL.
- Structured data. Carry over any schema the old site had, such as Organization, Article, FAQ and Product.
- robots.txt and sitemap. Make sure the new
robots.txtdoes not block anything by accident, and thatsitemap.xmllists the final URLs. - Image alt text and file names.
Crawl both sites and compare
Ask Claude to automate the check:
Write a script that fetches every URL in migration/urls.csv from the old site
(https://old.example.com) and the new preview site (https://preview.example.com),
and compares status code, final URL after redirects, title, meta description,
canonical, H1 and word count. Output a CSV of every difference, and flag any URL
that returns something other than 200 or a single 301 hop.
Fix the differences, run it again, and repeat until the list is empty or every remaining difference is intentional.
Stage 7: Launch
Deploy to a preview first
Push the project to GitHub and connect it to a host such as Vercel, Netlify or Cloudflare Pages. Each of these builds your site on every push and gives you a preview URL. Run your crawl and a full click-through on the preview before you touch DNS.
Pre-launch checklist
- Forms send and the right person receives them
- Analytics fires on the preview with the production measurement ID
- Every redirect resolves in one hop
-
robots.txtallows crawling (preview builds often addnoindex, so remove it) - Mobile layout checked on a real phone
- Lighthouse scores are good on the home, a post and a landing page
- Favicon, social images and 404 page are in place
Switch DNS
Lower your DNS TTL to a few minutes a day before the switch, so the change takes effect quickly and you can reverse it quickly. Then point your domain at the new host, add the domain in the host’s settings, and wait for the HTTPS certificate. Test the live domain right away: home, a post, a form and a redirect.
After launch
- Do not delete WordPress. Leave it running, password protected or on a temporary domain, for at least 30 days.
- Submit the new sitemap in Google Search Console. Use the Inspect URL tool on your top pages.
- Watch Search Console daily for the first two weeks. Check Pages for new 404s and “Crawled but not indexed” spikes, and compare clicks against your baseline. Some movement in the first couple of weeks is normal.
- Fix 404s as they show up by adding redirects. Claude can read the report and write them.
- Add monitoring. Our Search Console MCP server lets Claude check your performance data by asking.
What changes after the move
Day to day, editing the site means asking for changes. “Add a new post from this draft”, “update the pricing table”, “change the footer links” each become a request to Claude Code, which edits the files, builds the site, and opens a preview for you to approve before anything goes live. We cover that workflow in How Claude Code edits a website.
If your team includes people who do not use a terminal, there are ways to give them a friendlier front door, from a Git-based editor to a short request form that triggers Claude. Decide that before launch, not after.
Common mistakes
- Changing too much at once. Migration is not the time for a redesign or a content rewrite. Move first, improve after.
- Skipping the redirect map. This is the number one cause of post-migration traffic loss.
- Forgetting forms. A form that silently fails costs leads for days before anyone notices. Test every one.
- Deleting WordPress early. You will want to compare something against it.
- Trusting the first build. Claude Code gets you most of the way fast. The last stretch of detail and checking is yours.
Want us to do it for you?
This guide is the full path, and a capable team can follow it. It is also the exact process we run for clients, and it takes a fair amount of care at the audit and SEO stages. If you would rather hand it off, our AI-native site migration practice handles the whole move: the audit, the rebuild in your design, plugin replacement, redirects, QA and launch, with your rankings protected throughout. You get a site your team can update by asking for changes, plus a walkthrough of how to do it.
See the practice on the AI-native site migration page, or request an introduction and tell us about your site.